
Your cart
There are no more items in your cart
Configure your shade sail online
Design, shape, fabric. Ready in 5 days.
Learn more

This guide will take you step by step through the design and installation of your custom motorised roll-up sail, ensuring an elegant and functional covering for your outdoor spaces.
To guarantee a flawless result, we have simplified the configuration and installation by dividing them into two separate PHASES. Each PHASE corresponds to a separate order, and the materials will be delivered in two shipments:
This process allows you to install the anchors before finalising the sail's exact measurements, ensuring a precise installation with no margin for error.
With the first order, you will receive all the anchors and necessary fixing materials, allowing you to install the support points for your sail before confirming the final measurements.

The PHASE 1 package will include:
Thanks to this two-PHASE process, you can install the supporting structure with confidence and verify every detail before your custom sail is produced.
During this initial phase, you will be asked for all the necessary information to configure your motorised roll-up sail. The configuration consists of five steps, in which you will choose:
Below, we will analyse each phase with practical examples.
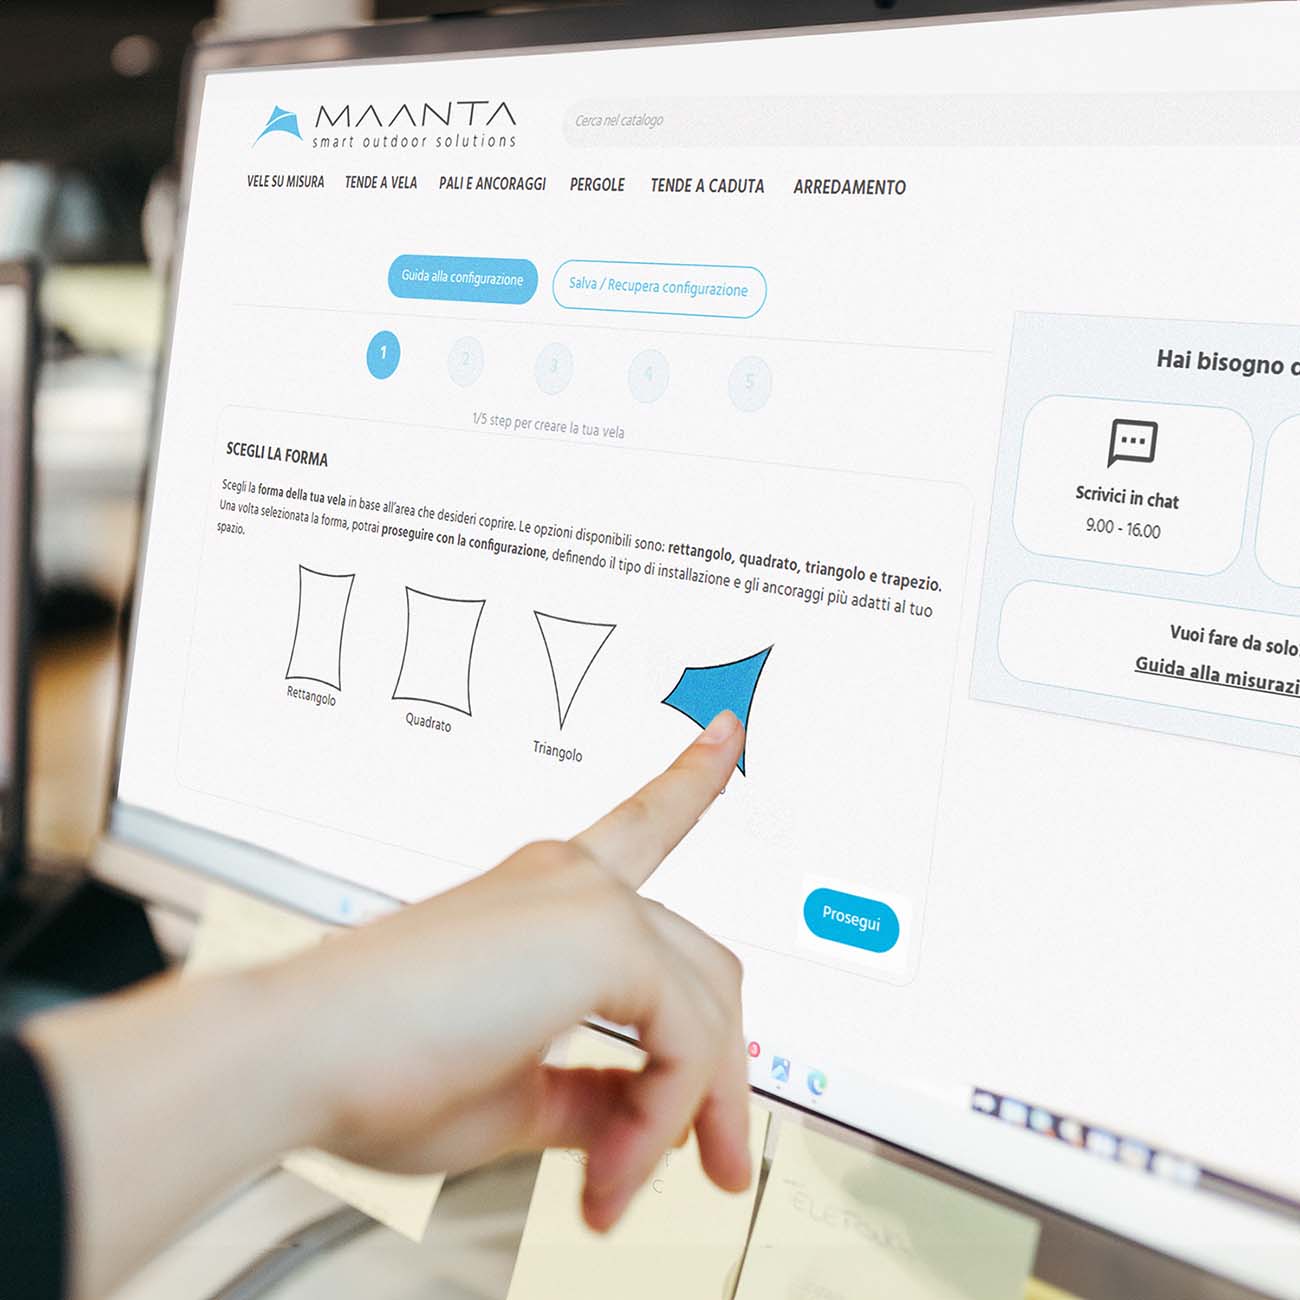
The first step is selecting the shape of your sail. The following options are available:
Example: If you want to cover a rectangular patio of 4m x 5m, the best choice would be a rectangular sail.
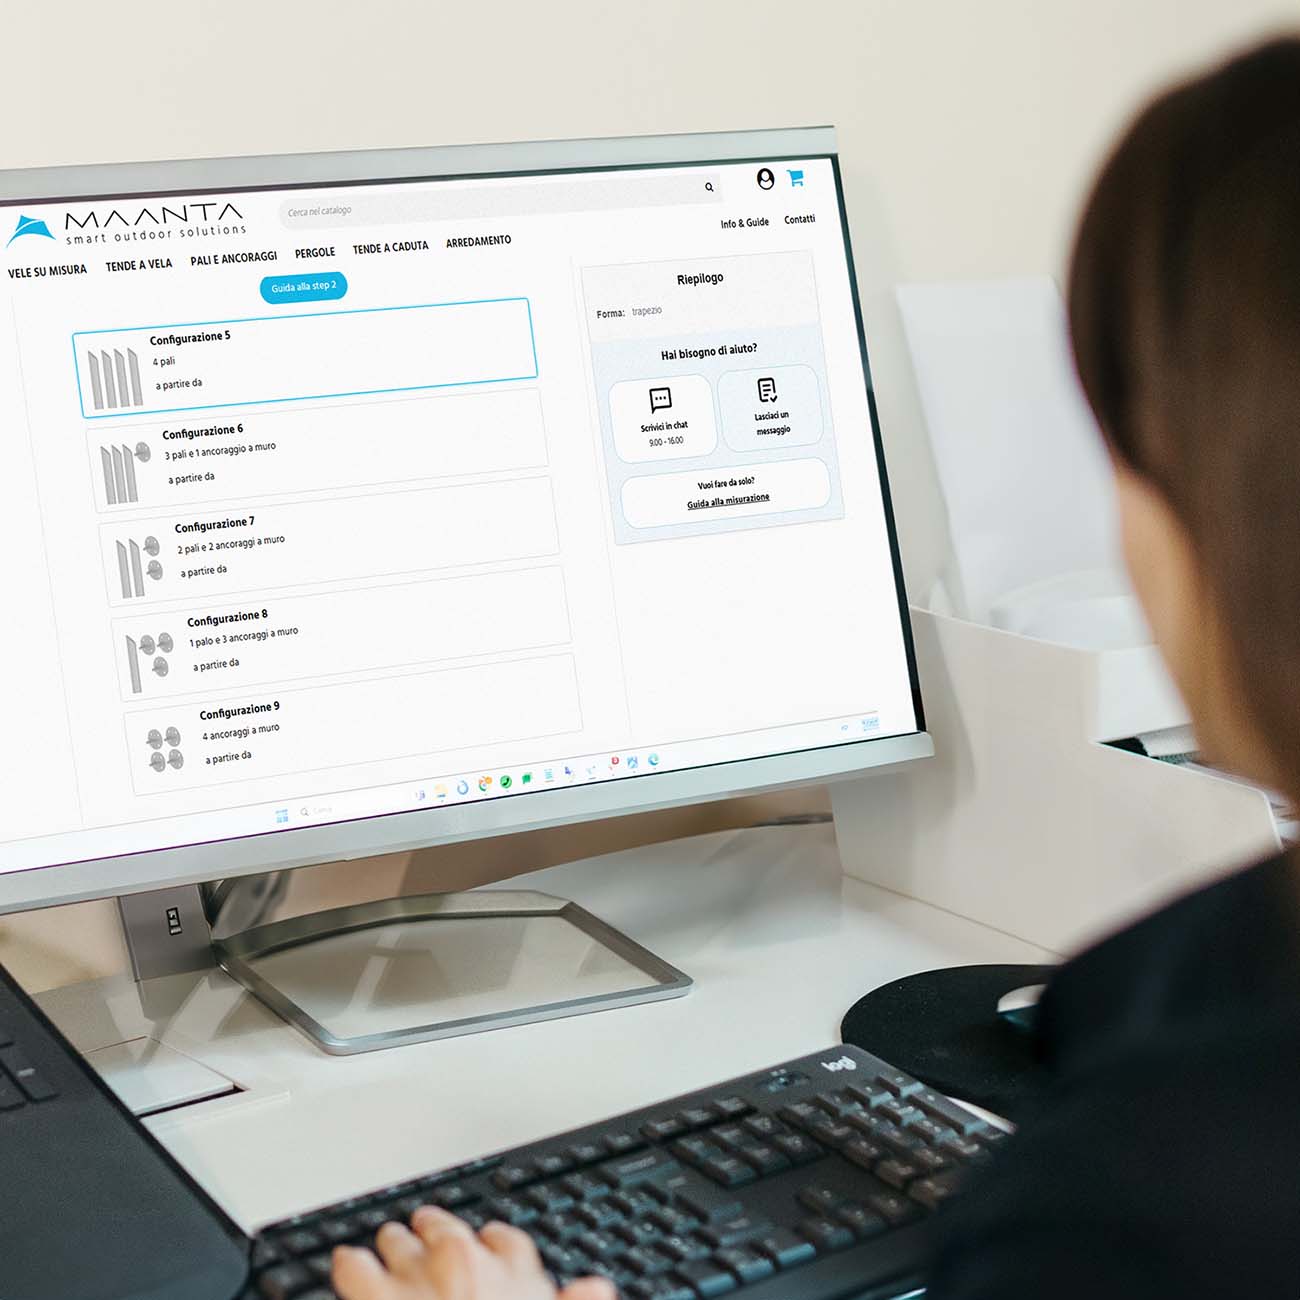
Here, you will define how the sail will be fixed. The options depend on the chosen shape and include pole and/or wall anchors.
Example: If you select a triangular sail, you will need to specify how to fix the three corners:
The system will display the available options for each configuration.
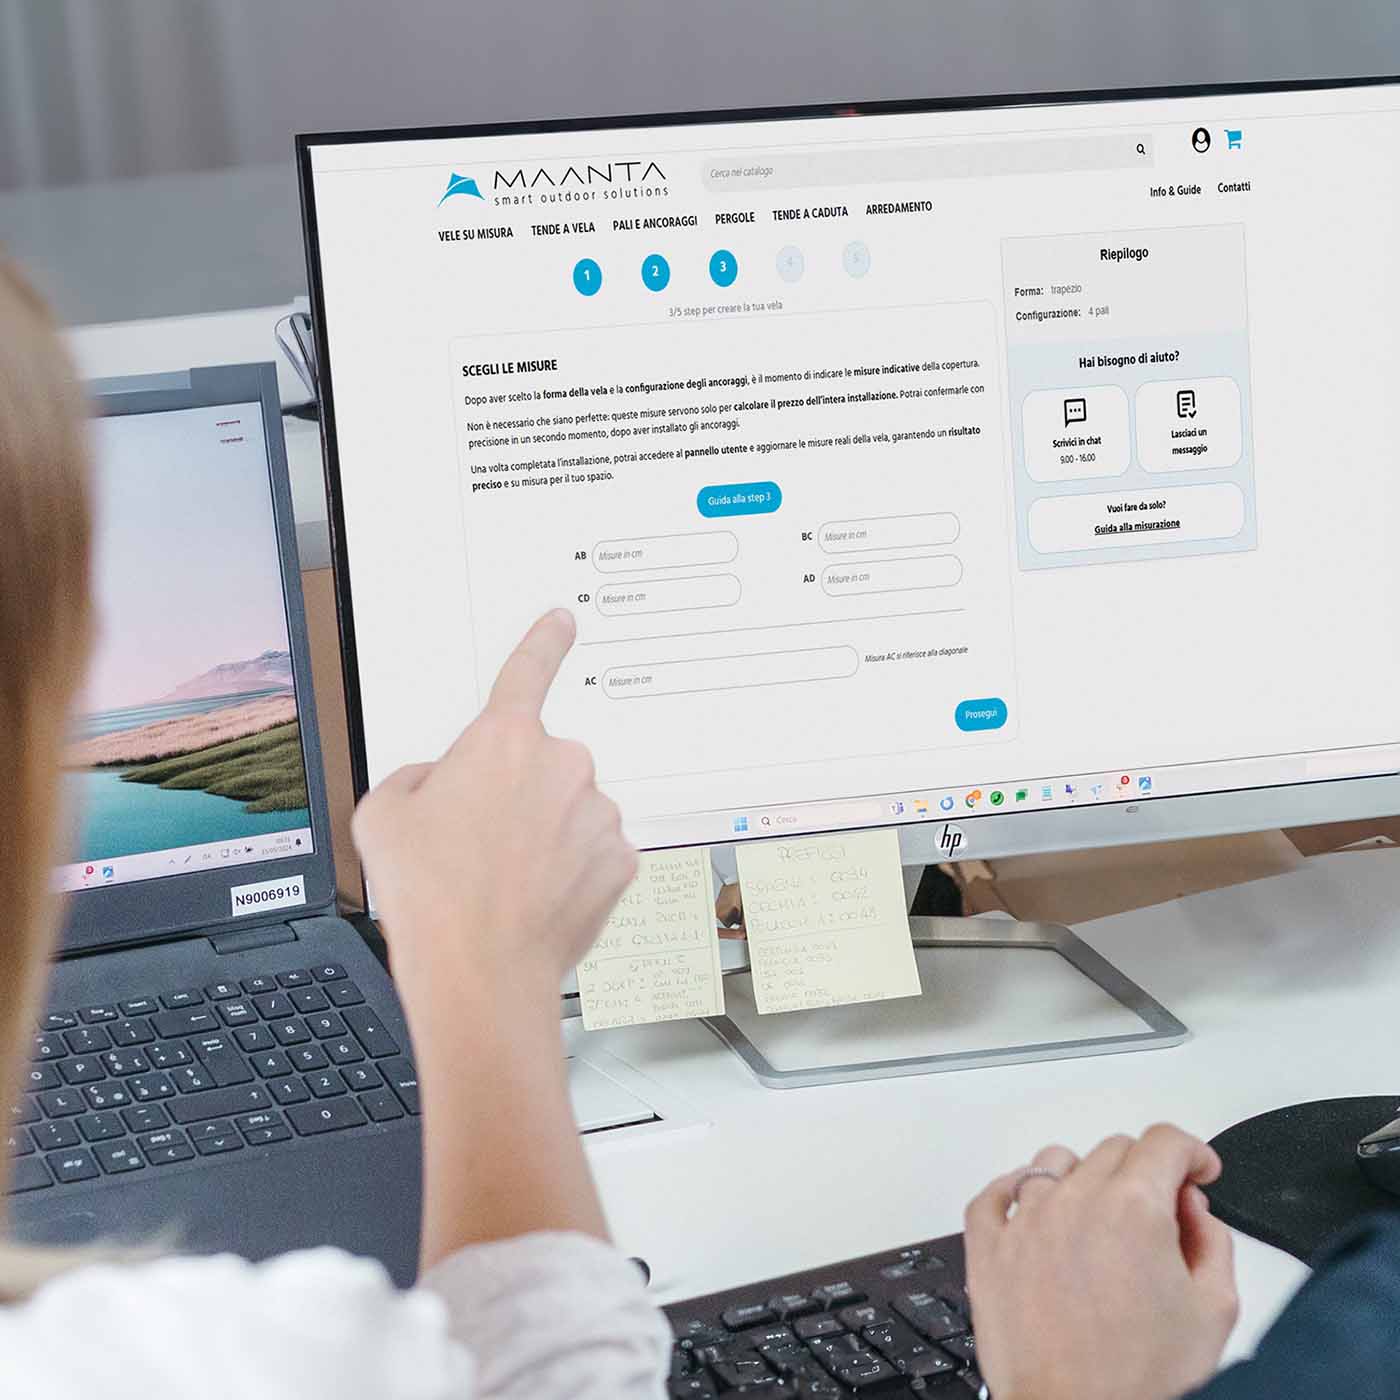
At this stage, you will enter the measurements between the anchors (from pole to wall, pole to pole, etc.). The system will automatically calculate the optimal sail size, considering the necessary tensioning.
Example: If the distance between two wall anchors is 4.50 metres, the system will calculate a sail that is slightly smaller to ensure proper tensioning.
Important Note: The measurements will be confirmed definitively in PHASE 2, once the anchors have been installed.
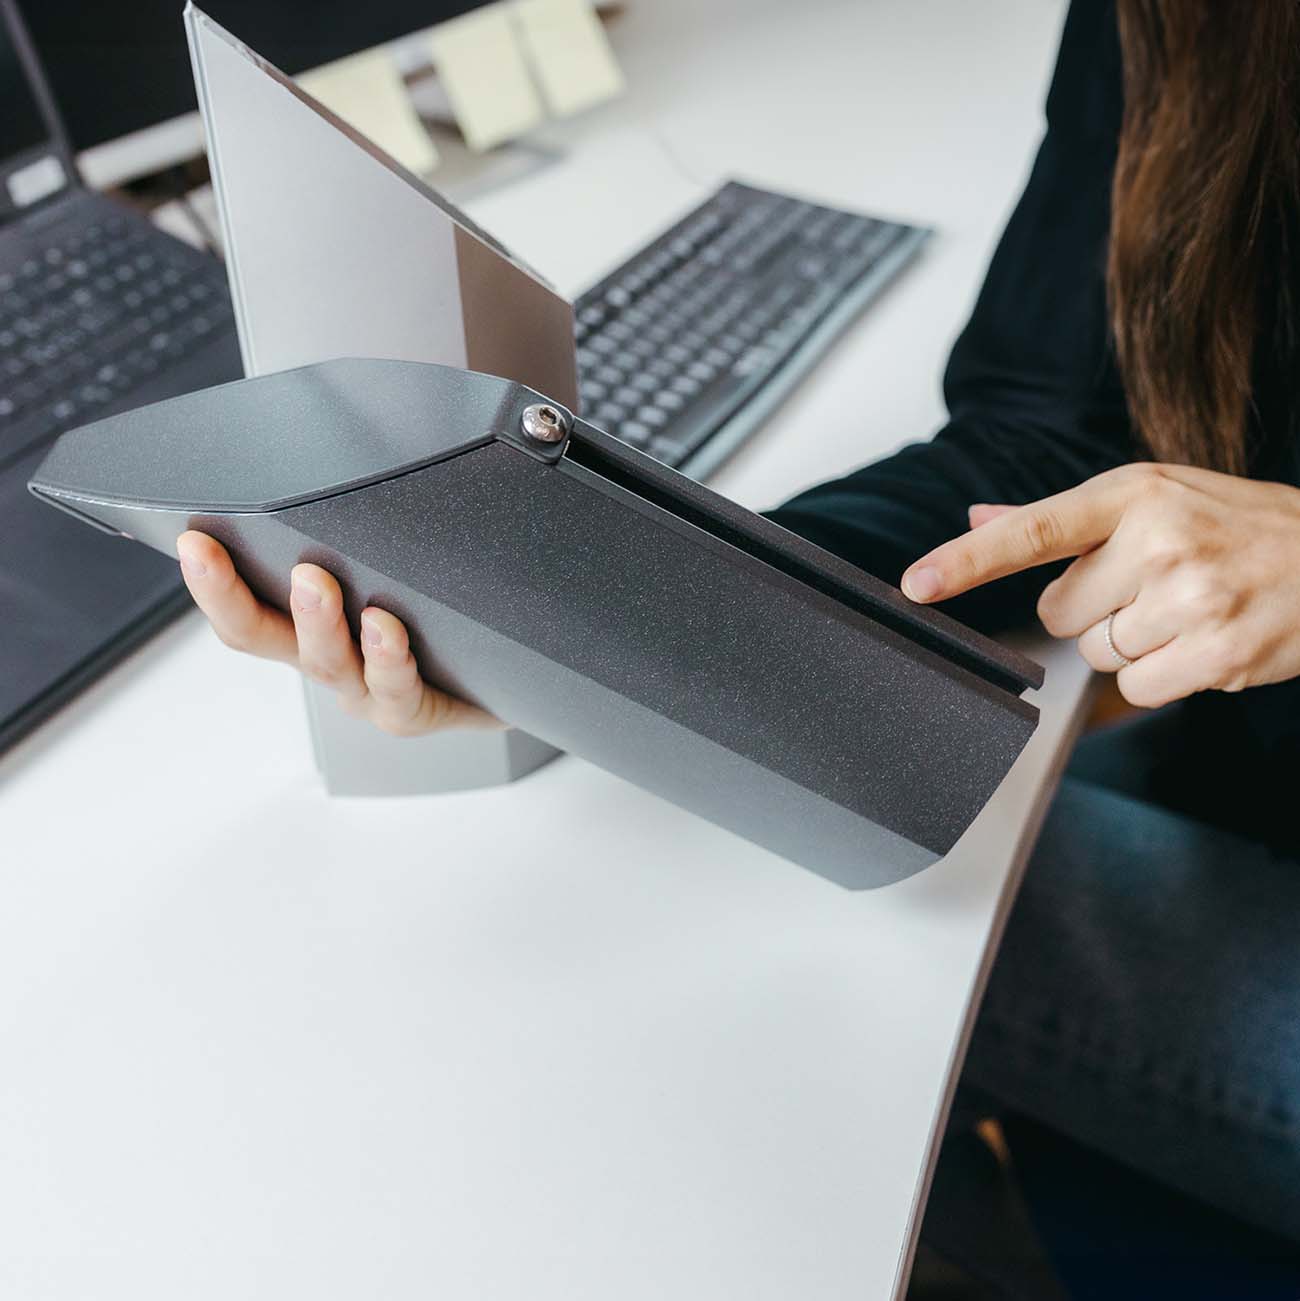
Here, you will select the fixing points and their type. The available options include:
Each pole is available in three finishes:
Example: If you have a load-bearing wall and want a sail with two corners fixed to the wall and a 75° inclined pole, you should select:
There are two types of shading fabrics available:
Each fabric is available in different colours.
Example: If you prefer a natural and warm effect, you might opt for the waterproof Purishade® fabric in beige.
Important: At the end of PHASE 1, along with the anchors, you will receive a kit containing fabric samples. This allows you to see the material and colour in person before confirming your choice in PHASE 2.
Flexibility: The fabric and colour can be changed in PHASE 2 at no additional cost.
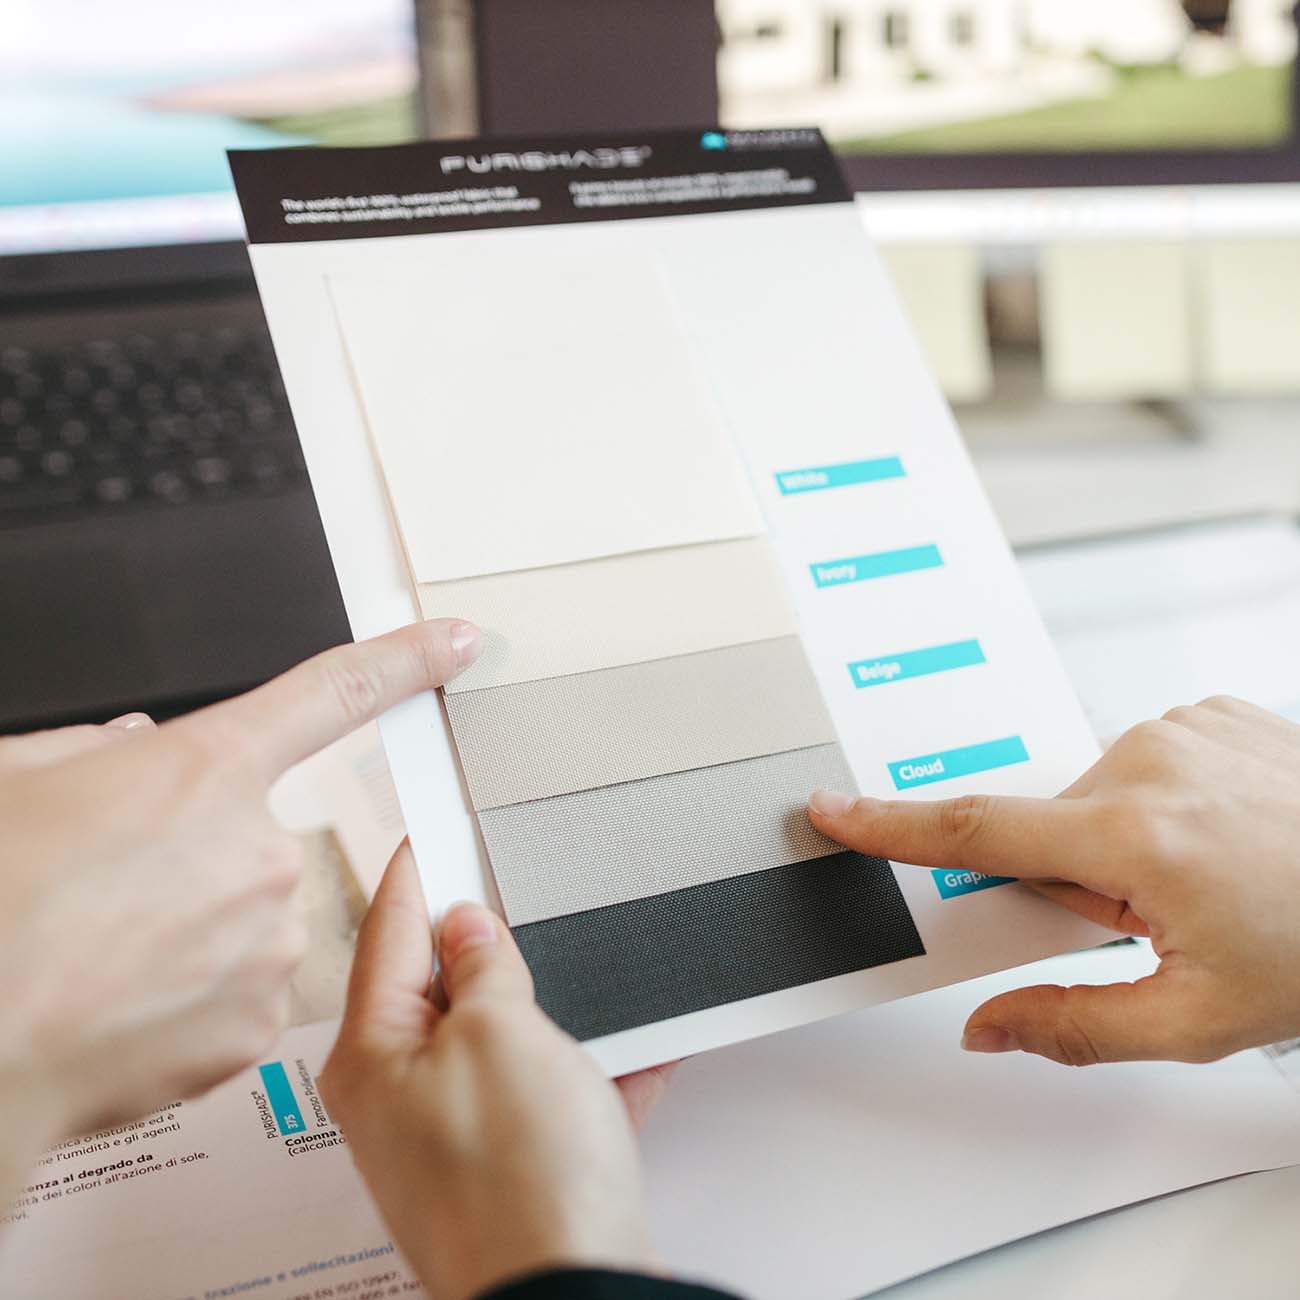
PHASE 1 allows you to prepare the entire structure by receiving and installing the anchors before confirming the sail. Once this phase is complete, you can move on to PHASE 2, where you will define the exact sail measurements and proceed with the second order for the production and delivery of your motorised covering.
After installing the anchors received in PHASE 1, it's time to complete the setup of your motorised roll-up sail. This second PHASE allows you to confirm the final measurements, select the fabric, and proceed with the purchase of your custom sail.
Thanks to this TWO-PHASE process, you can securely install the support structure and verify every detail before your custom sail is produced.
IMPORTANT: Ensure you take precise measurements of the anchors, keeping the measuring tape taut and recording the dimensions from the centre of the anchor hole for accurate results.
What You Will Receive in PHASE 2
With the second order, you will receive the shading sail with its roll-up system, motor, solar panel, anemometer, and other accessories.
In detail, the PHASE 2 package will include:
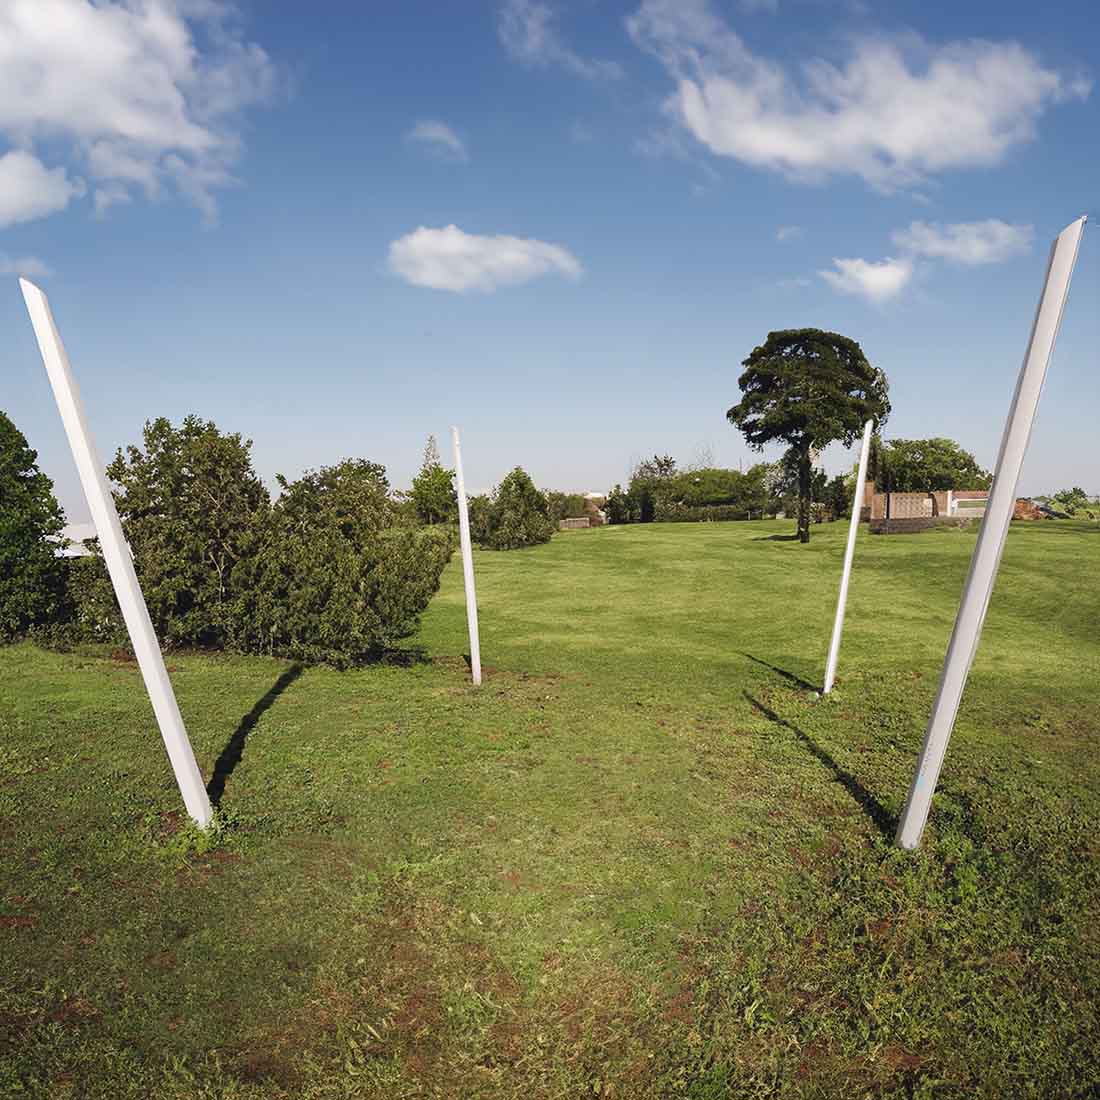
1. Accurate Measurement of Anchor Distances
Now that the anchors are installed, you can take precise measurements between each fixing point.
Using the measuring tape provided in PHASE 1, you can record the actual distances to ensure the sail is perfectly compatible with your setup.
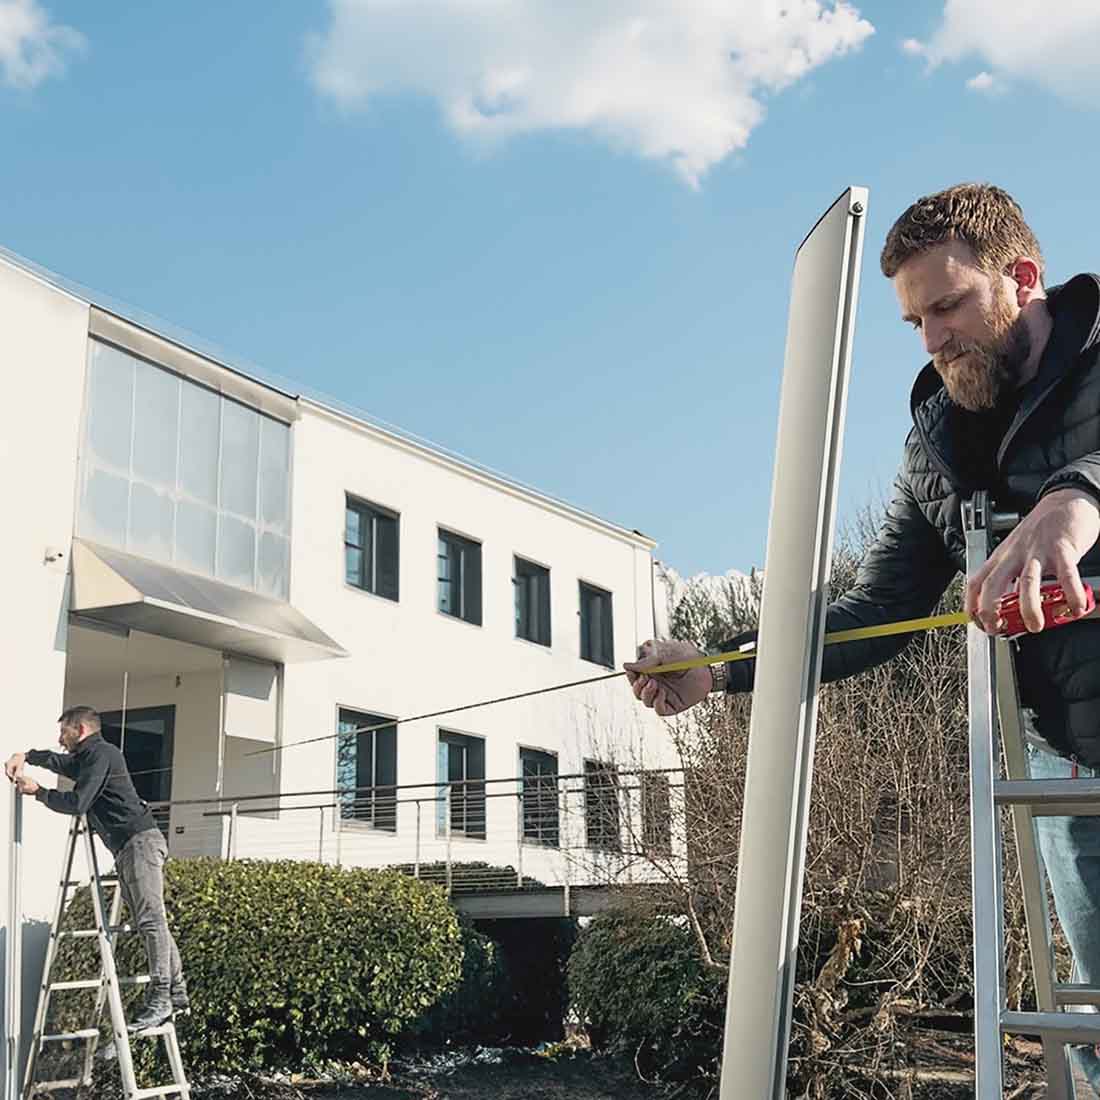
2. Accessing the User Panel and Confirming Your Configuration
After placing the first order (PHASE 1), you will receive an email with a detailed guide to help you step by step with the anchor installation.
The same email will contain a direct link to complete PHASE 2.
By logging into your user panel, you can retrieve your configuration and proceed with confirmation or make any necessary adjustments.

3. Modifying Measurements and Fabric Choices
If the actual measurements differ from those indicated in PHASE 1, you can easily update them in your user panel.
You can also finalise your choice of fabric and colour, having had the opportunity to evaluate the samples received in PHASE 1.

4. Automatic Price Calculation and Final Payment
Remember, if you change the fabric or colour, the price remains the same!
If you modify the measurements, the system will automatically recalculate the sail's price based on the actual dimensions. This way, you will only pay for what you will receive.

5. Fast Production and Delivery
Once the order is completed, your custom sail will go into immediate production.
Delivery will take place within 4-5 working days, allowing you to install your covering quickly.

This two-phase system allows you to install the anchors before confirming the final sail measurements, eliminating any margin for error. This ensures a precise, tailor-made configuration for optimal results.
If you have any questions, don’t hesitate to contact us via the dedicated form available here.
While configuring your motorised roll-up sail, you have the option to pause the process at any time. You can save your choices and resume later without losing any details. Once you save your configuration, you will receive a unique code that allows you to reload it later. This feature lets you take more time for precise measurements or further considerations.
If needed, you can share your configuration via email or SMS. With this function, the recipient will be able to view your exact choices, including measurements, anchor points, fabric, and colour selection. This way, you can get advice or discuss with others before finalising your order.
Please note that by sharing your configuration, the recipient will have the ability to modify it.
If you have any doubts or need assistance, our team is available via live chat during office hours. One of our experts will guide you through the configuration process, answering any technical or installation-related questions.
Outside of support hours, you can leave a message directly in the chat. We will get back to you as soon as possible, ensuring you receive the help you need without having to start the process from scratch. We are here to provide you with a smooth, clear experience without any unexpected issues!
This feature allows you to save your configuration and retrieve it later.
Every space is unique and requires a nearly custom solution.
With the configurations available in this step, you can choose the anchors based on the features of your outdoor space.
Depending on your existing structure, you can select from different anchoring options with poles and wall plates.
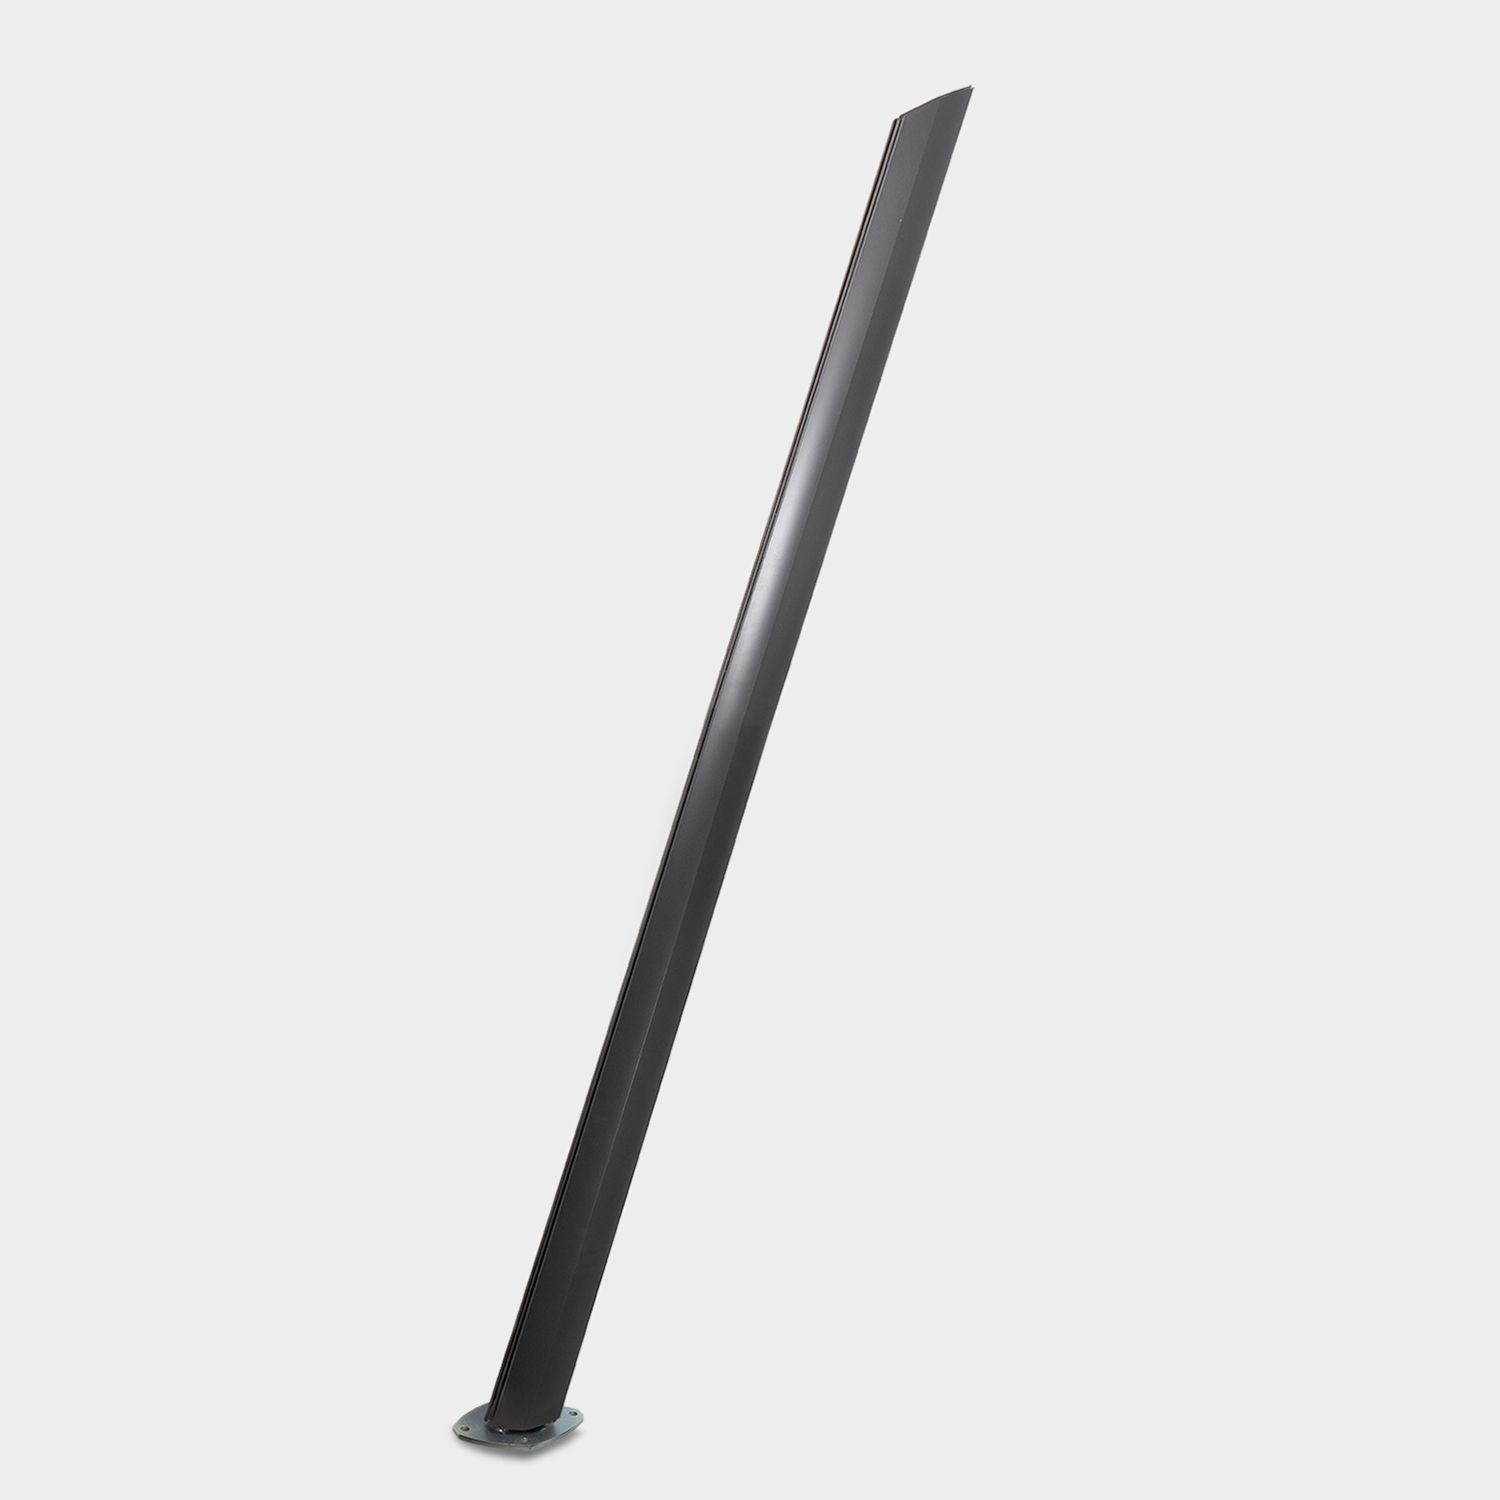
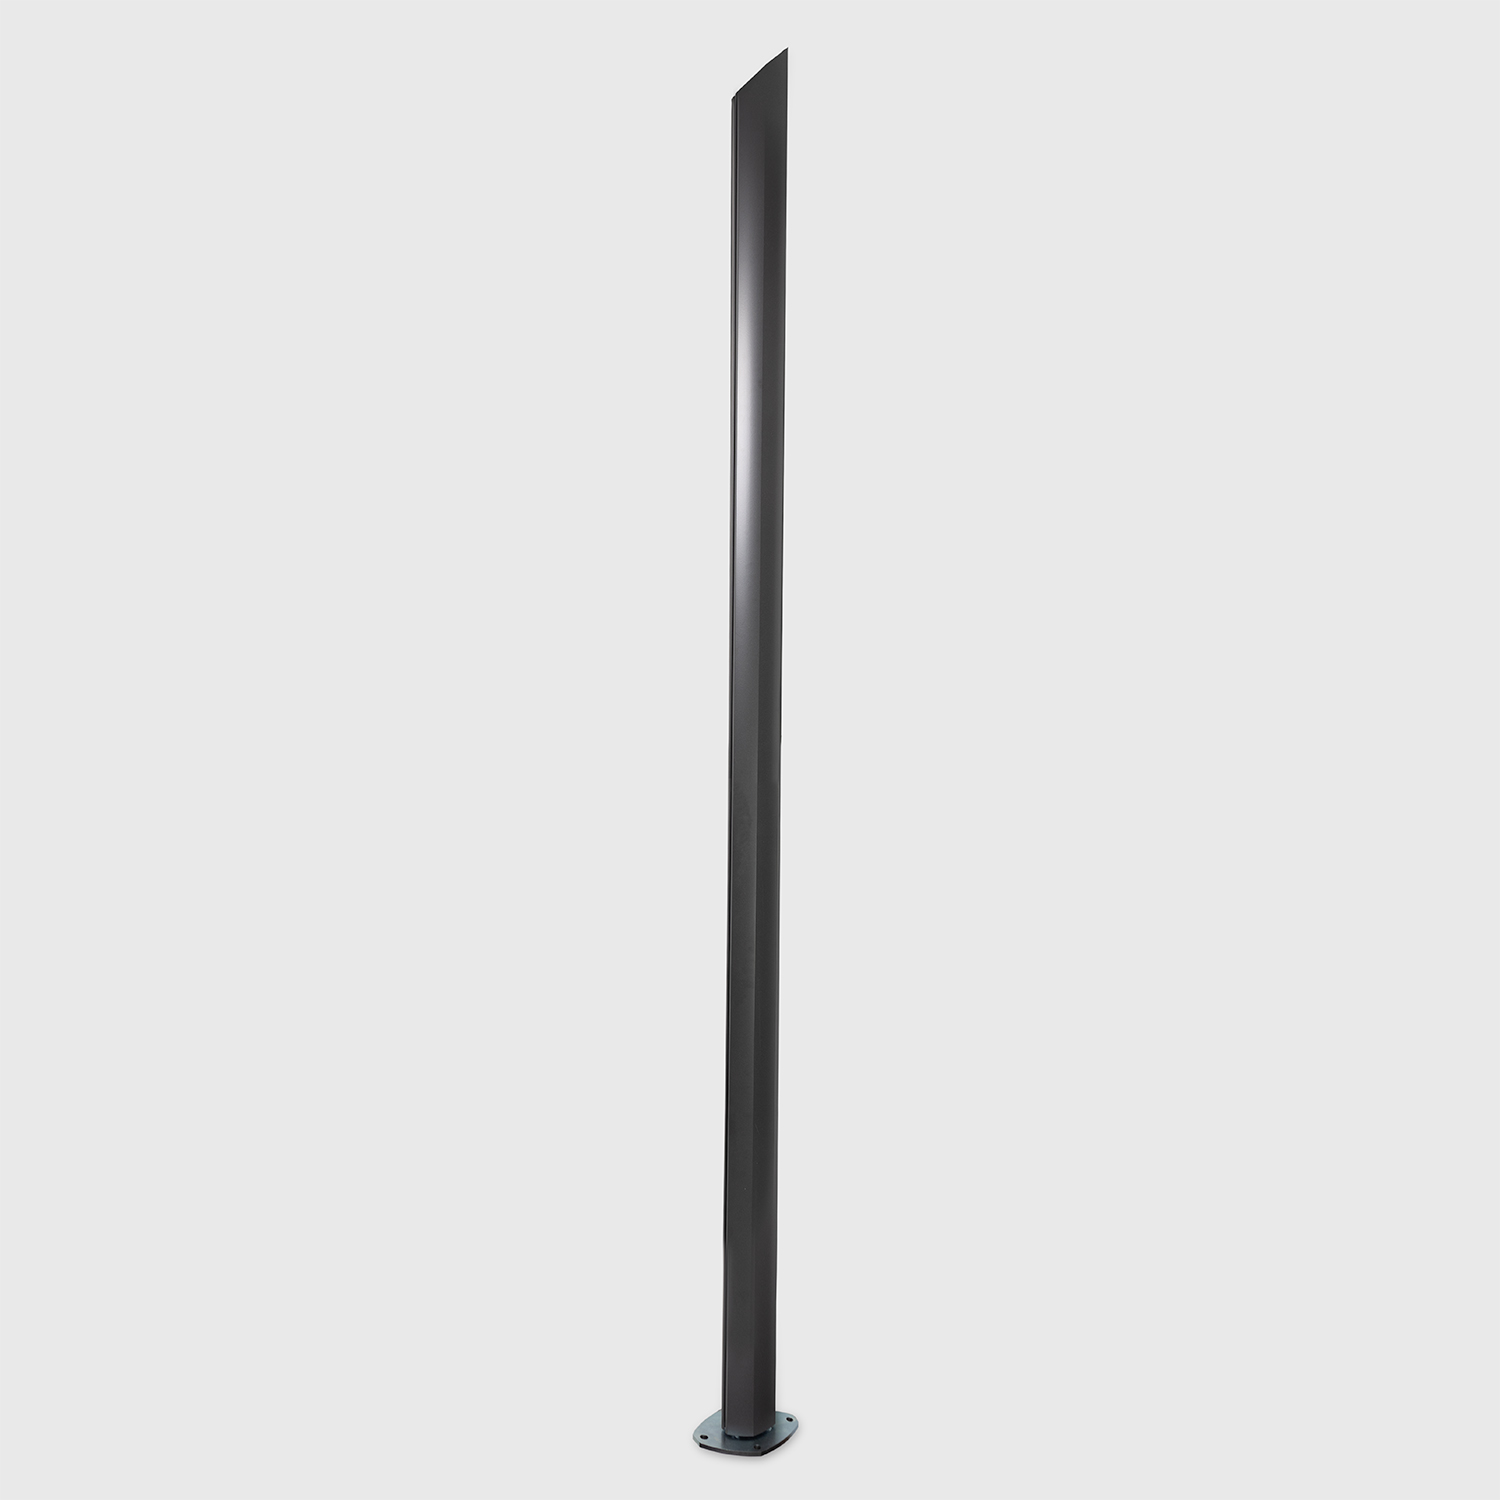
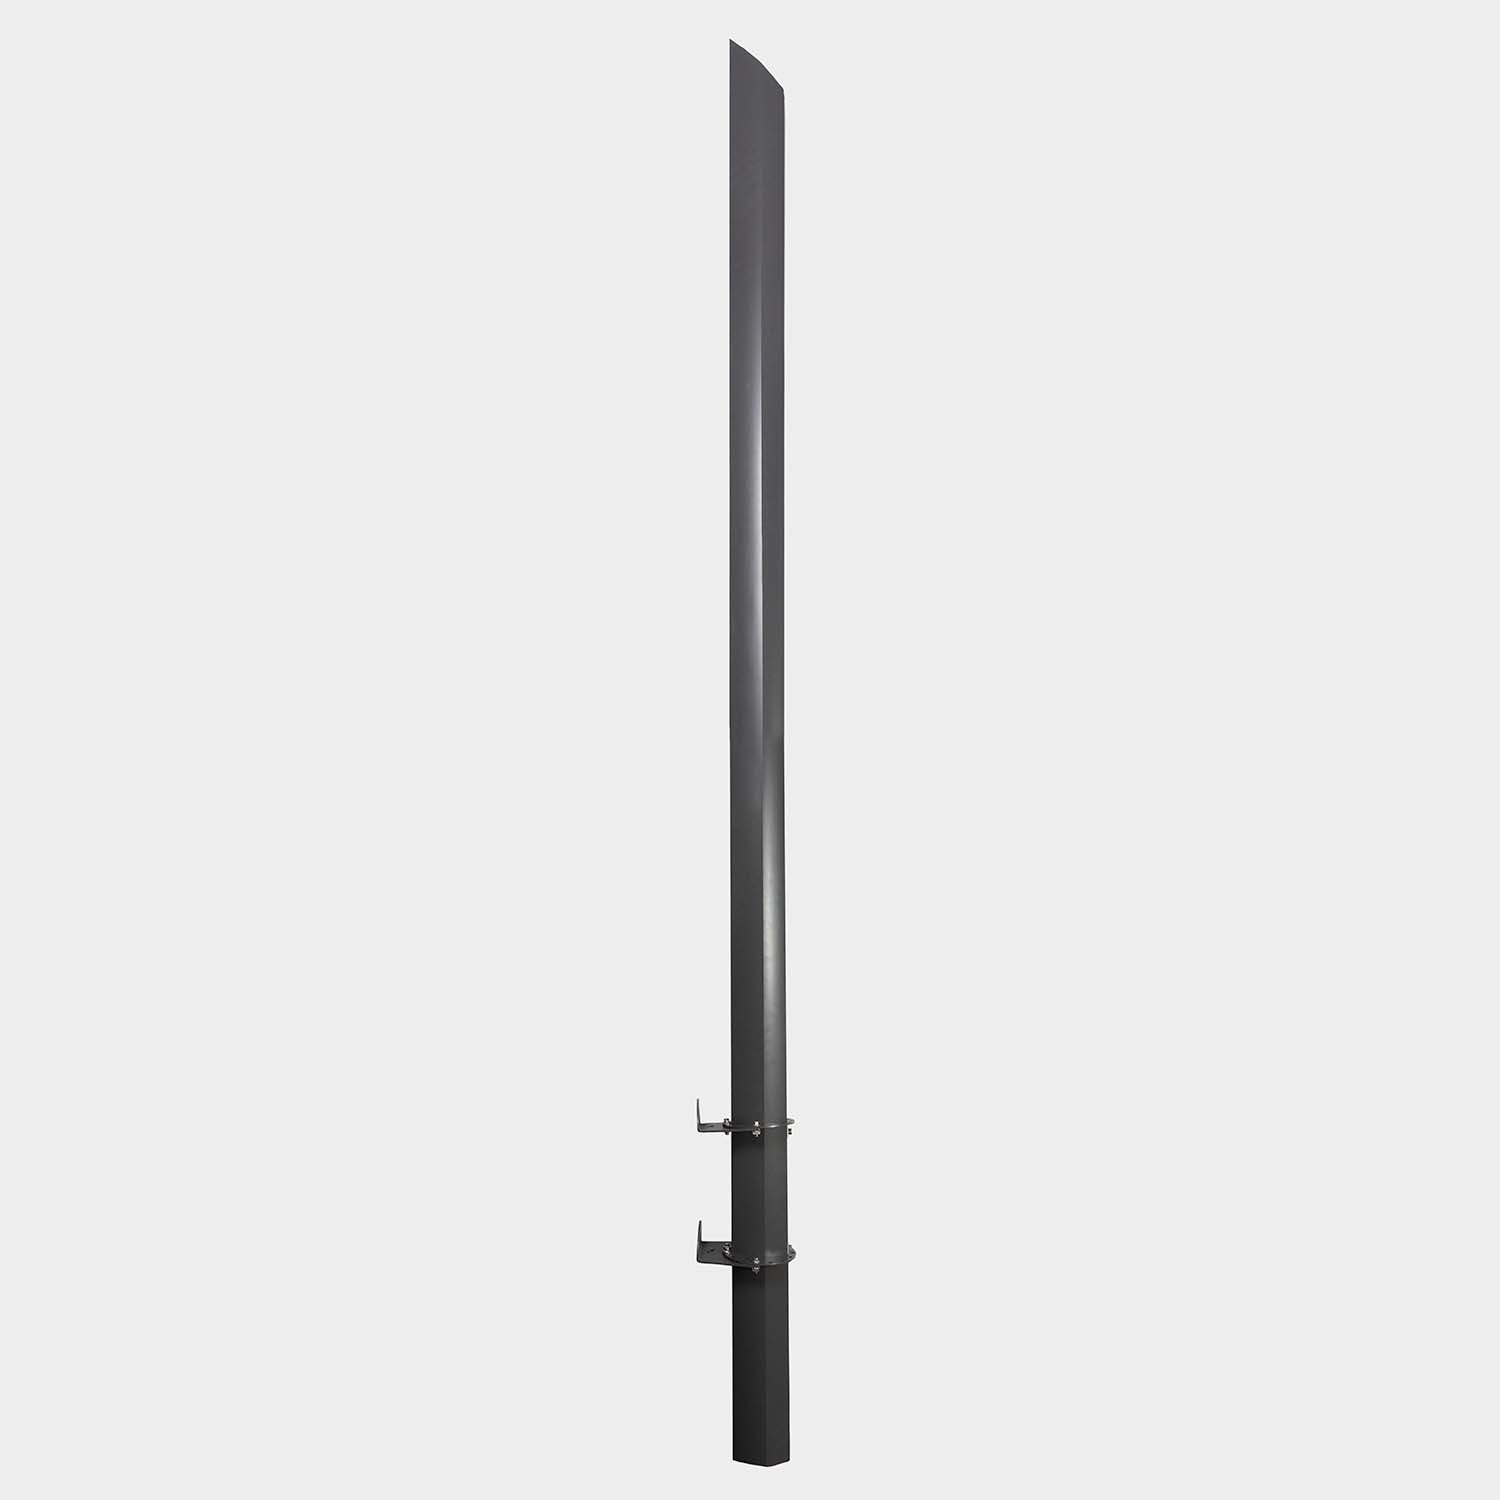
These poles are made of powder-coated aluminium, resistant to harsh weather conditions and corrosion. They are available with inclinations of 75°, 90°, or with a wall collar.
These are made of stainless steel, the same material used in marine applications to withstand the most challenging weather conditions. The plates combine functionality with Maanta’s unique yet minimalist design, ensuring a seamless installation.
They are perfect for those with solid walls to anchor the sail.
There are two types of plates: one for securing the sail’s corner and another for mounting the roller system.
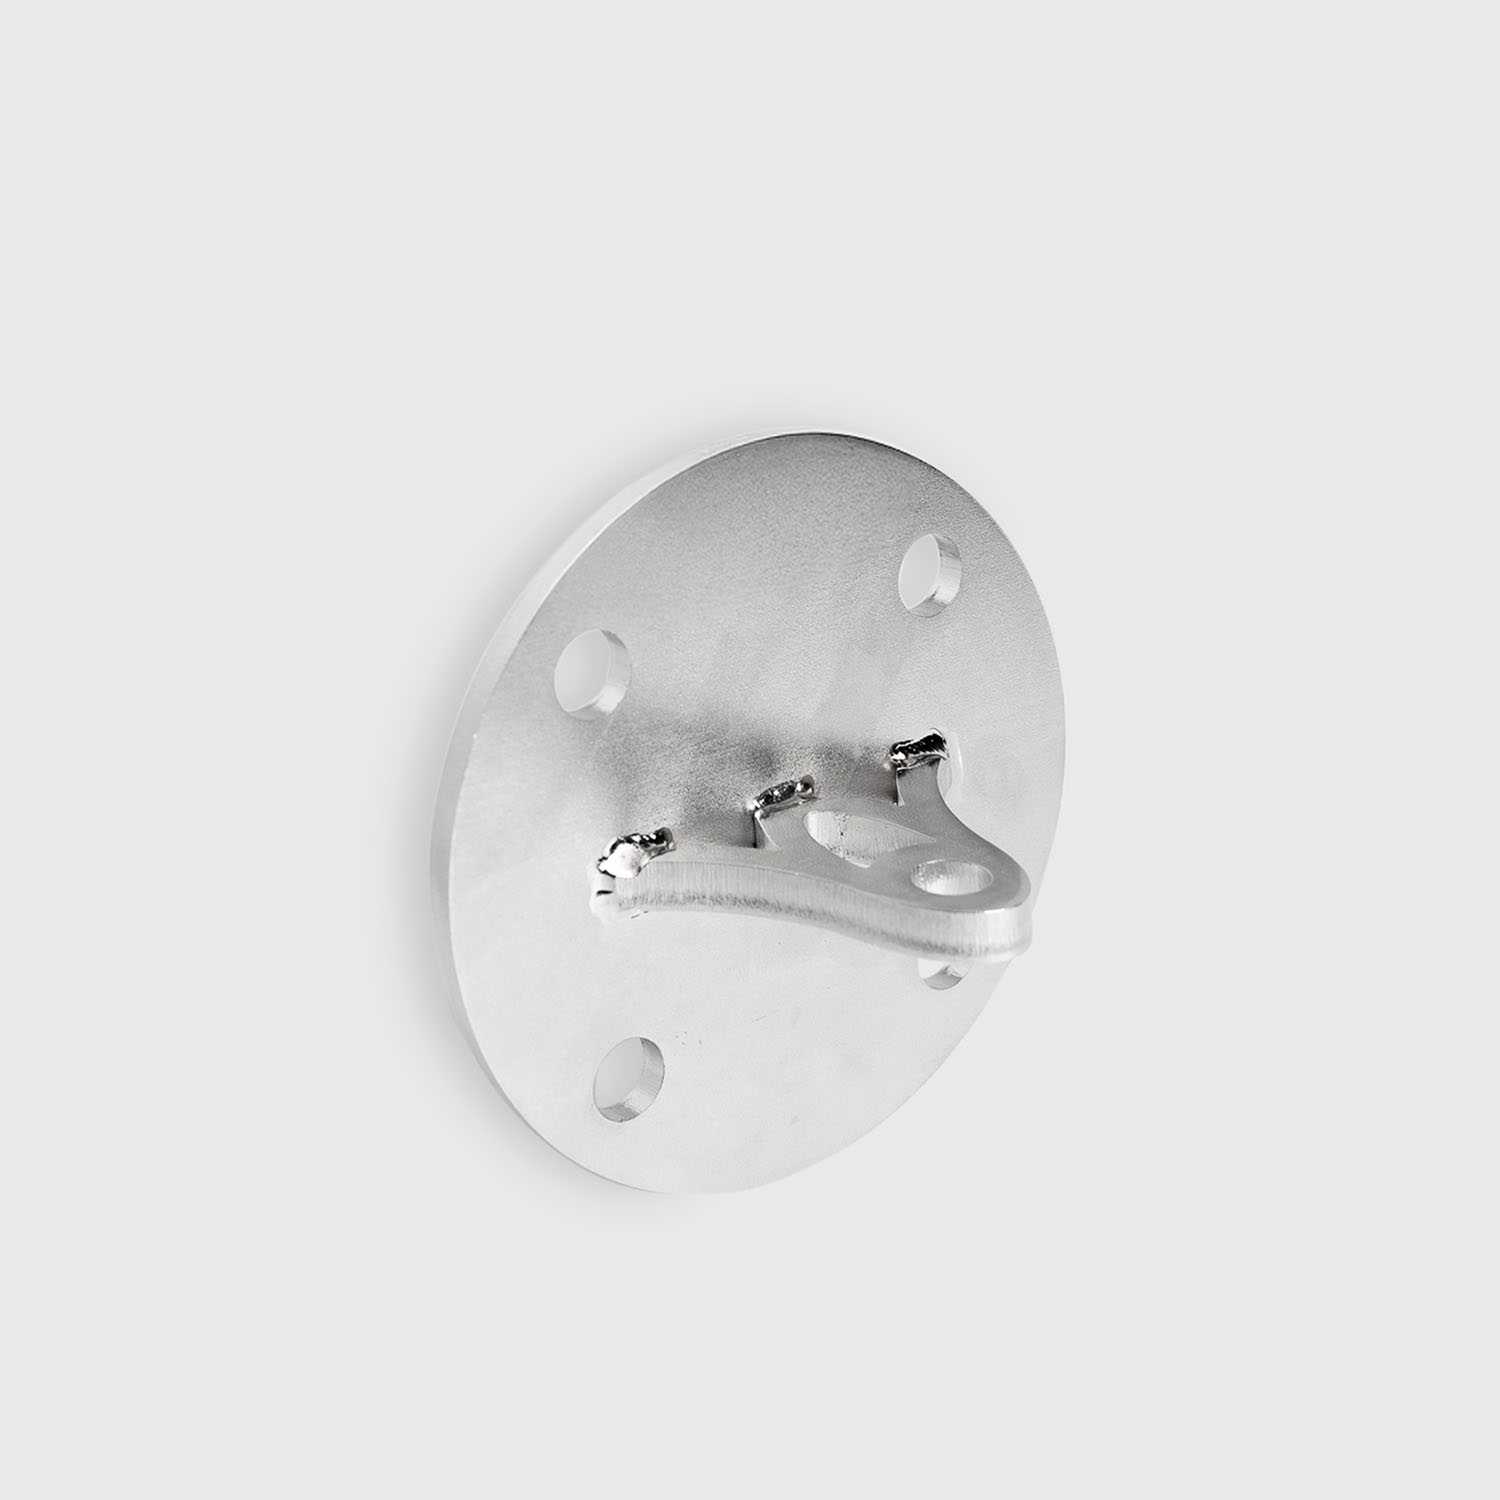
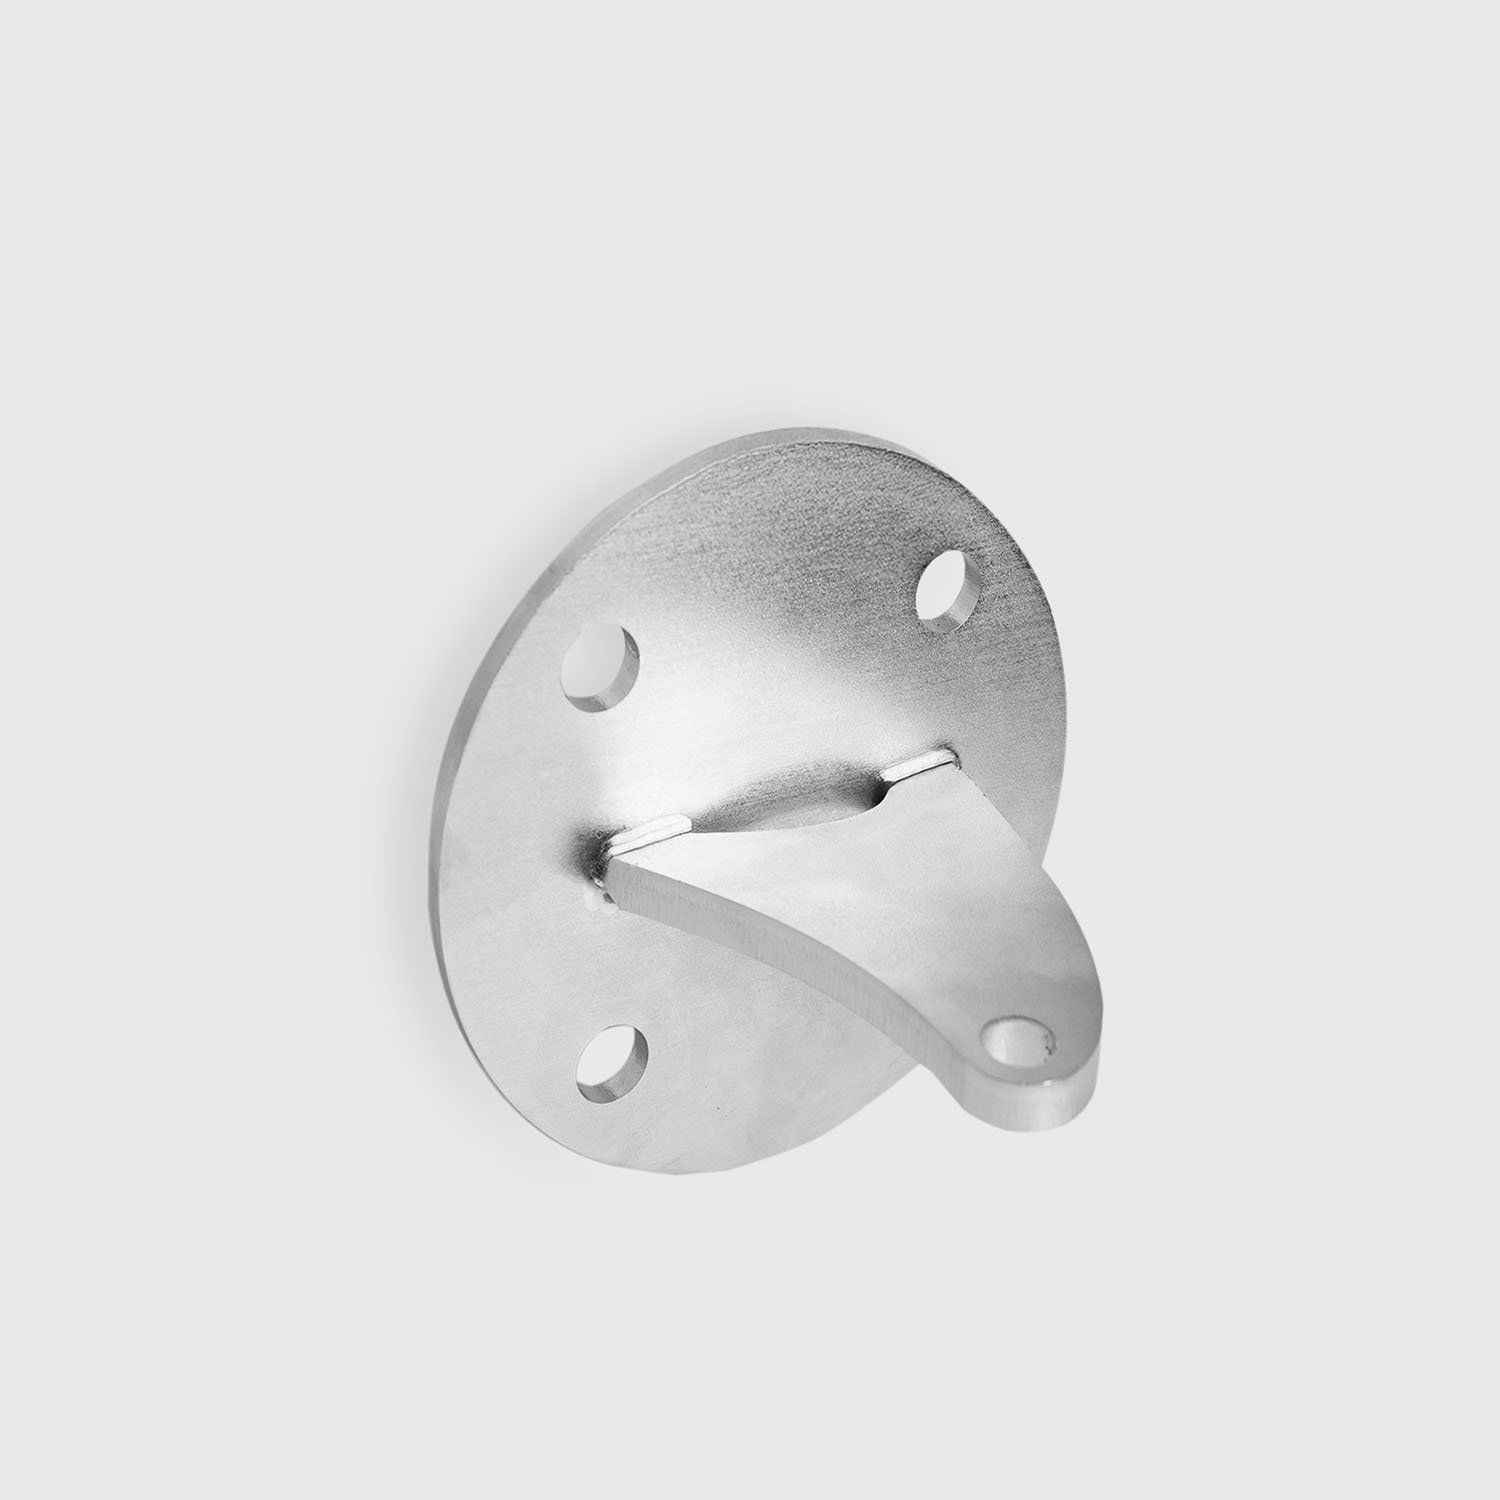
You can select the wall plate in Step 4 of the configurator.
Depending on the selected shape, there are 4 to 5 configuration options.
For example, if you choose a triangular sail, you can decide whether to use three wall plates, one pole with two plates, or two poles with one plate.
Below are the available combinations, illustrated with graphics.
Triangular Sail:
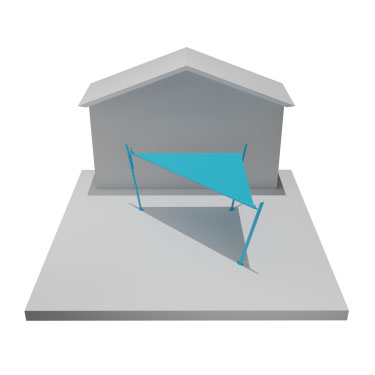
Configuration 1: 3 poles
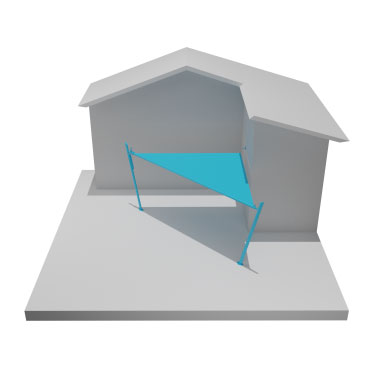
Configuration 2: 2 poles and 1 wall anchor
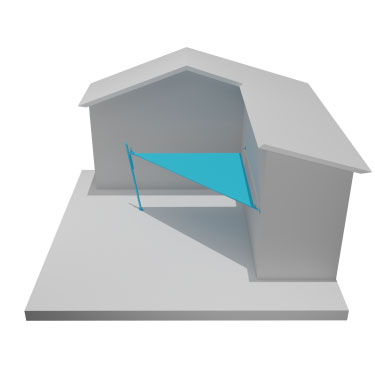
Configuration 3: 1 pole and 2 wall anchors
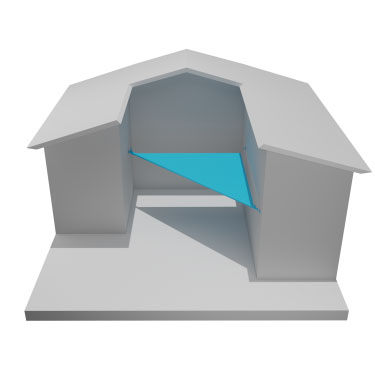
Configuration 4: 3 wall anchors
Square, Rectangular, or Trapezoidal Sail:
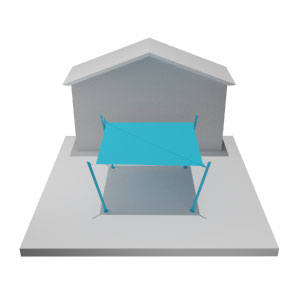
Configuration 5: 4 poles
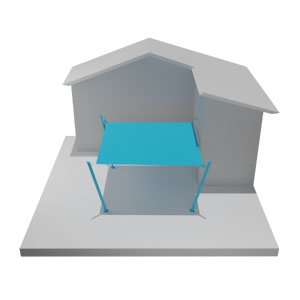
Configuration 6: 3 poles and 1 wall anchor
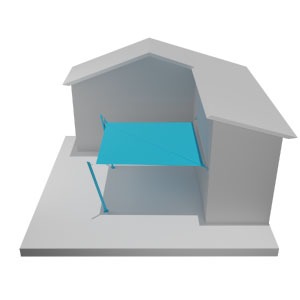
Configuration 7: 2 poles and 2 wall anchors
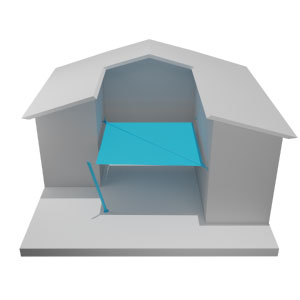
Configuration 8: 1 pole and 3 wall anchors
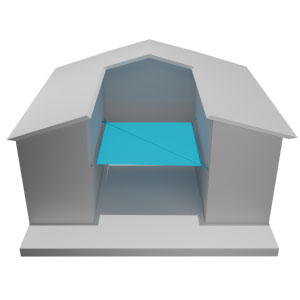
Configuration 9: 4 wall anchors
If you're still unsure about the best configuration for your space, contact us here.
Accurate measurement is essential to ensure a professional installation.
In Step 1, identify the potential anchor points and take measurements between them.
At this stage, measurements can have a slight tolerance of a few centimetres. The final dimensions will be confirmed once the anchors are installed.
In Step 2, once the anchors are in place, precise measurements must be taken.
IMPORTANT: All required measurements always refer to the anchor points, not the actual fabric size.
The system will automatically calculate the sail’s dimensions.
STEP 1: Use a rigid tape measure to measure the area where you want to install the sail, considering obstacles such as walls, trees, or other elements that may affect the installation.
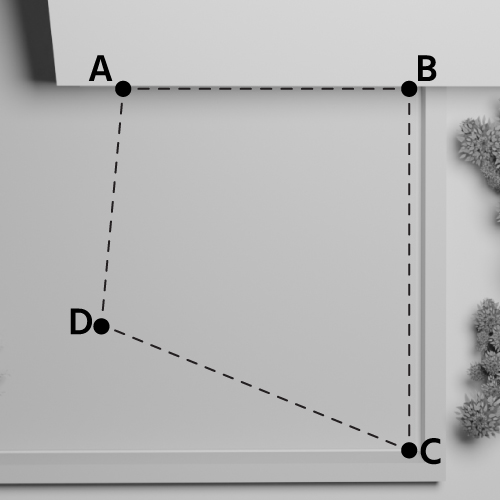
STEP 2, use the measuring tape provided with the anchor kit to accurately measure corners and the sail’s diagonal.
Measurements must always be taken from anchor point to anchor point.
IMPORTANT: If you decide to install the sail with an inclined winding roller, the actual distance between corner A and corner C will be greater than in a perfectly horizontal installation. This happens because tilting the roller increases the length compared to a parallel-to-ground setup.
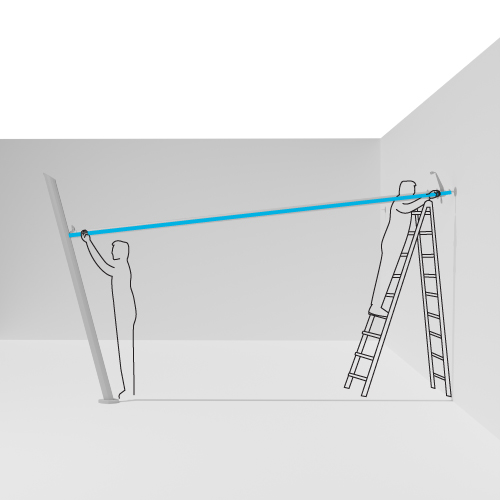
The AC side is conventionally identified as the winding roller.
In a quadrilateral (four-cornered sail), AC corresponds to the diagonal.
In a triangular sail (isosceles, scalene, or equilateral), side AC corresponds to one of the sides.
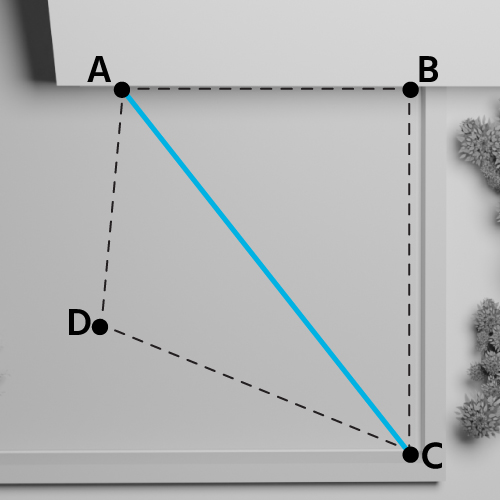
Example: Quadrilateral Shape
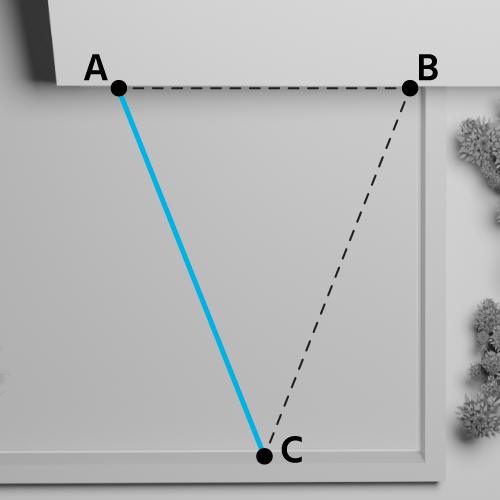
Example: Isosceles, Scalene, and Equilateral Triangle
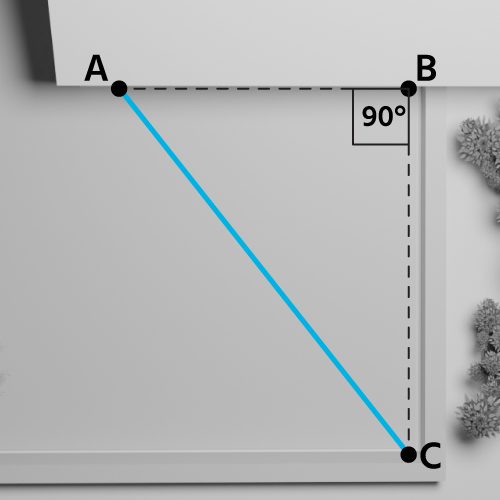
In a right-angled triangle, side AC is the hypotenuse.
Example: Right-Angled Triangle
IMPORTANT: See the corner constraints for corners A and C in the specifications at the bottom of the page.
Corner A is always where the motor is installed, serving as the main reference point for configuring the sail.
Defining this corner first allows for precise placement of the other anchor points, ensuring a correct and balanced installation.
Corner A should be the highest point of the boom.
The length of the winding roller (side AC) has a tolerance of 2.5 cm per side. This measurement must be taken with extreme precision in STEP 2, once the anchors are installed.
The winding roller can be inclined.
The maximum allowable inclination for side AC is ± 25% of the winding roller’s length.
Example:
If the winding roller (side AC) is 8 metres (800 centimetres) long
Maximum inclination = 800 / 100 x 25 = 200 centimetres
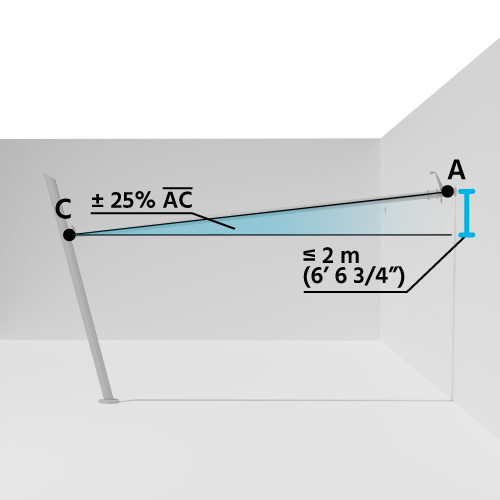
IMPORTANT: If you install the sail with a tilted winding roller, the actual distance between corner A and corner C will be longer than in a perfectly horizontal installation. This happens because tilting the roller increases the length compared to a parallel-to-ground setup.
TIP: It is recommended NOT to tilt the roller towards corner A, as this is where the motor is.
General Constraints
To ensure the project’s feasibility, it is essential to follow specific technical constraints when designing the motorised roll-up sail.
Special Constraints for Triangular Sails
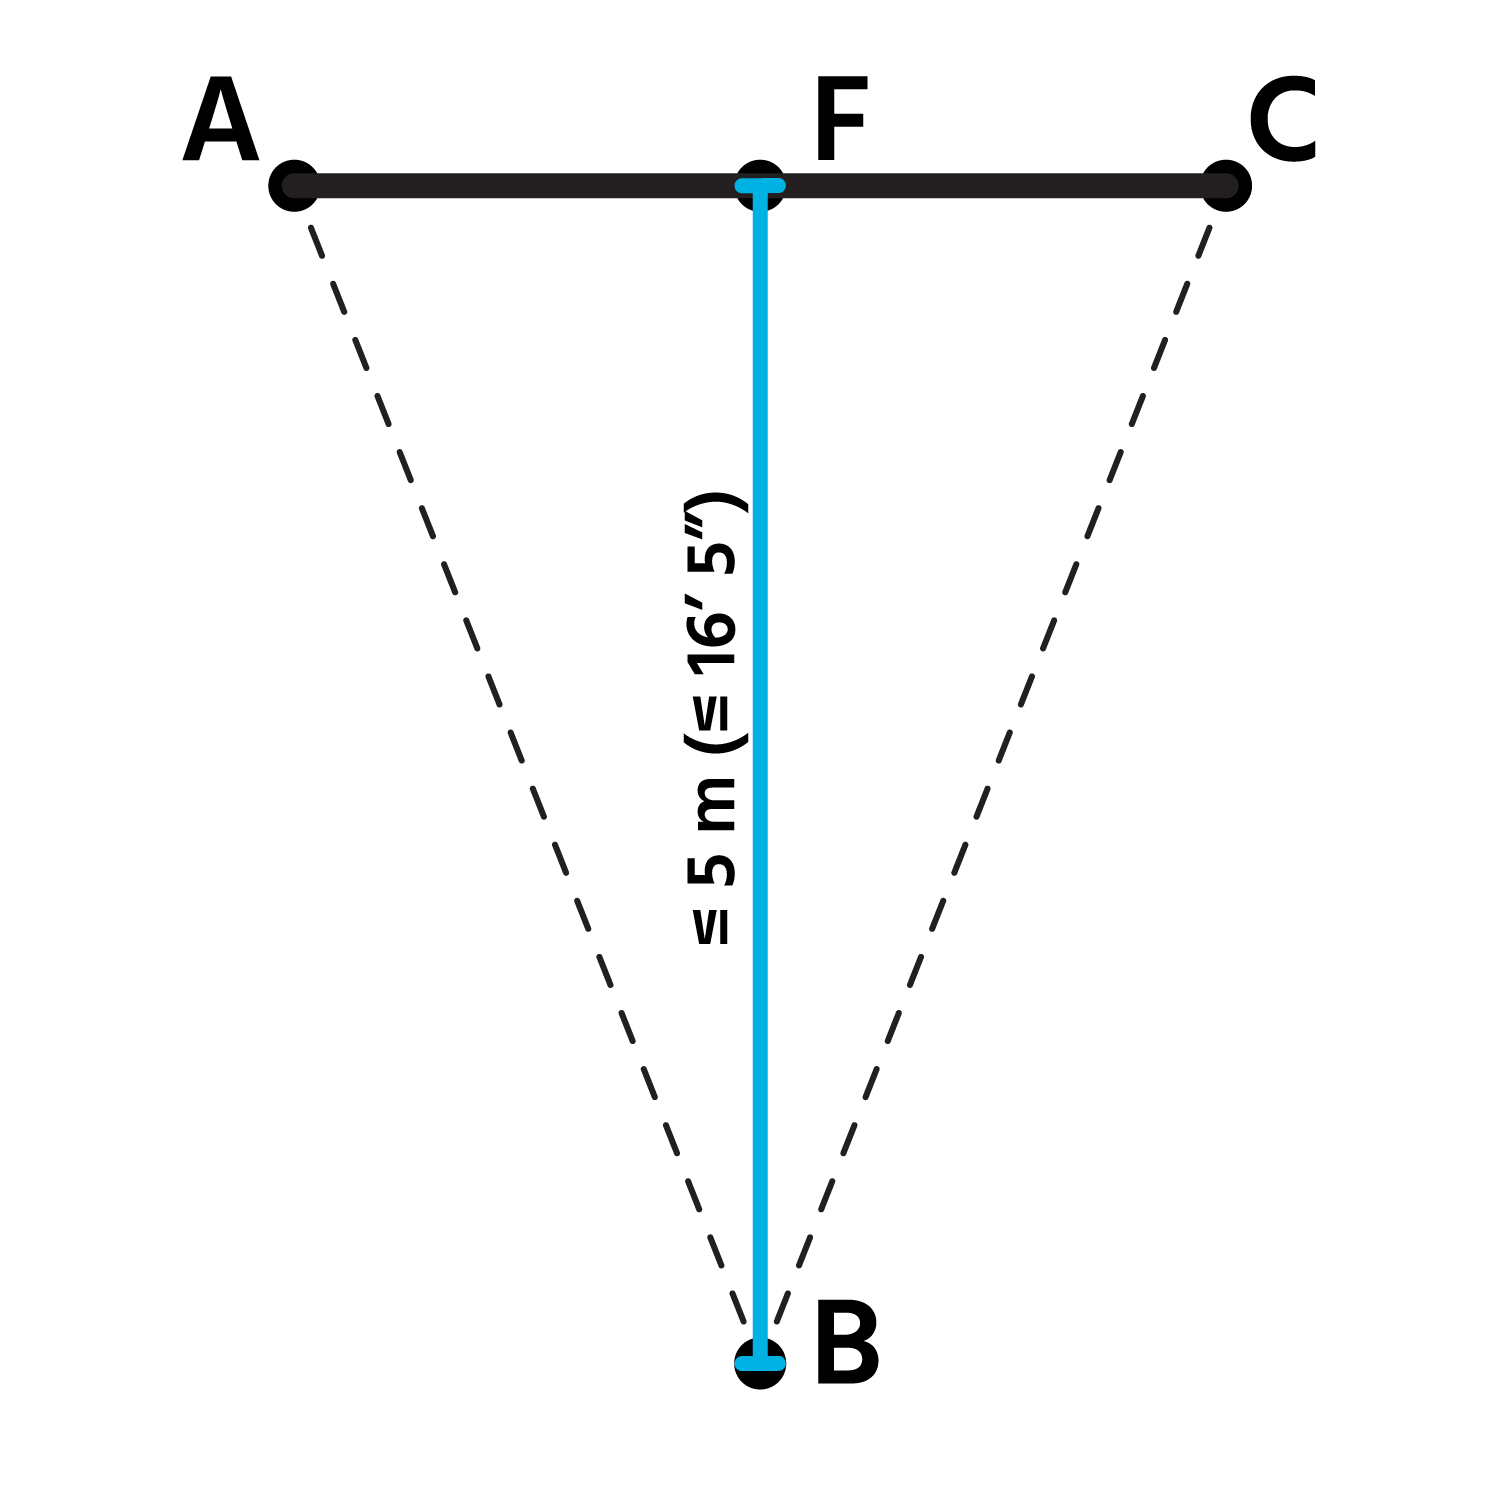
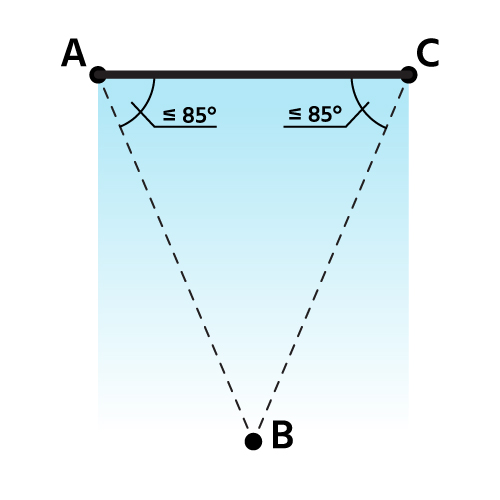
Special Constraints for Quadrilateral Shapes (Square, Rectangle, Trapezoid)
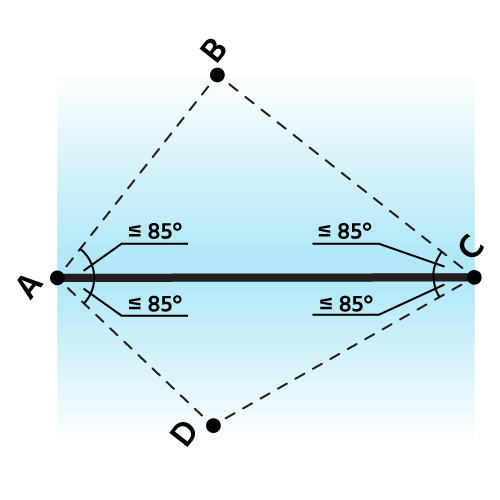
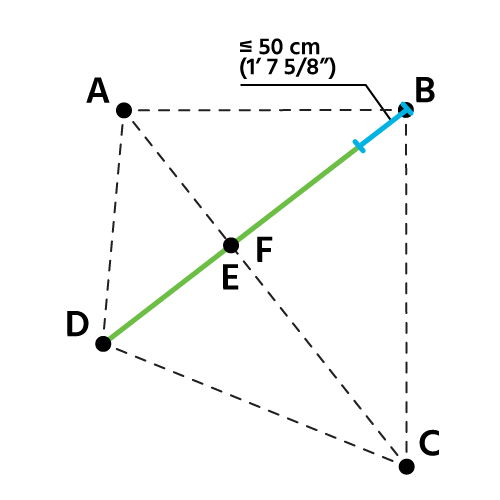
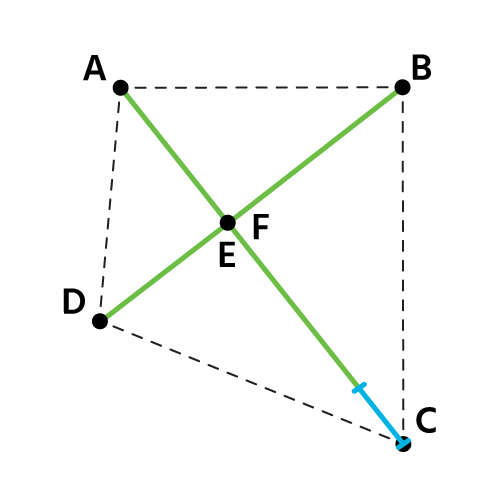
In Step 4, you can define the details by selecting the type and colour of anchor for each corner of your sail.
For your installation, you can choose from various types of anchors, from poles to wall plates.
Alu Simple poles, made of powder-coated aluminium, are resistant to salt and ensure optimal stability and strength. They are available in three versions:
Learn more with the Alu Simple product sheet, clicking here.
Wall plates allow you to create an anchor point directly on the wall. They are made of 316 marine-grade stainless steel, an extremely durable material, perfect for marine or particularly humid environments.
The plates are available in two versions:
The poles are available in three finishes, designed to harmonise with different architectural and landscape contexts:
The wall plates are available in stainless steel.
ATTENTION: Side AC corresponds to the sail's diagonal and represents the roller tube. Ensure you select the correct anchors for points A and C.
Important: The A corner always corresponds to the motor anchor and represents the starting point for defining the sail's configuration. It is important to start from this reference and, based on its position, determine the other anchors. This way, the installation will offer correct tensioning and perfect alignment of the sail.
If you have doubts or need technical advice on choosing your anchors, save your configuration and contact us via chat or form; our team will help you select the correct configuration.
Selecting the right fabric ensures you achieve maximum comfort and optimal protection based on your needs. Each material possesses unique characteristics that affect user experience and resistance to weather conditions.
For a comprehensive overview of each fabric's characteristics, visit our dedicated section.
Problems with the configuration?
Contact us by filling out the form below
Would you like to be contacted by phone?
Fields marked with * are mandatory


 Custom Shade Sails
 Standard size sails
 Poles & anchors
 Outdoor roller shades
 Indoor roller shades
 Garden Parasols
 Pergolas & accessories
 Outdoor furniture
 Lighting
 Maanta accessories
 Buying guide
 Assembly guides
 Current promotions
 IT
IT DE
DE FR
FR ES
ES CZ
CZ NL
NL PL
PL US
US UK
UK AU
AU EU
EU CH
CH About us
 Help & contacts
 Project assistance
 Become a partner
 English GB (English)